Showing posts with label recipe. Show all posts

Friday, October 23, 2015

foodie friday : breakfast fried rice


I mentioned last week that I tried out 2 of the stir fry ideas my phone news feed gave me.  The first was Thai Basil Beef with steamed rice.  I made a ton of extra jasmine rice and saved the rest in the fridge for the next stir fry day's meal of bacon and egg fried rice; recipe here!  Unfortunately we had just confirmed with the allergist that Myles is in fact still very much allergic to eggs (but can now have cow's milk!), so I had to make his a little special. 

All of the steps are done in a medium heat pan.  Unusual for a stir-fry dish, but you need it lower heat to properly crisp your cut up bacon, and not scald yourself on too hot bacon grease for the rest of the steps.  Because steps 3-6 are all done in bacon grease.

(1) Scramble your eggs, set aside (this is when I washed the pan so that Myles' portion would not be contaminated with his allergen).  (2) Cut up your bacon before you fry it so that you don't have to mess with crumbling it later. (3) Slowly fry the bacon until desired crispness, then scoop out the bacon to a separate bowl, leaving the grease in your skillet.  (4) Toss your diced onion into the grease and stir until they start to brown.  (5)  Dump your cold rice into the skillet with the grease and onion.  Sauté for a few minutes to soak up the grease and make sure the clumps of rice are all broken up and add your sauce.  (6)  This is the part where I added bacon crumbles and set aside enough for Myles, then dumped in egg to the rest.


I served this with roasted sweet potato, and the last of the Aldi's pork egg rolls that we now love.  I really loved the flavor of the sweet potato with the fried rice together.  Myles enjoyed his eggless portion, but who wouldn't like bacon rice?  And Kyle was very excited about this one.  He went to work the next day and told everyone about it.  I'd say this one is a winner!


Friday, October 16, 2015

foodie friday : thai basil beef


This recipe was on the news feed of my phone.  It was part of a 5 days of stir fry idea, and we ended up using 2 of them this week!  First up was thai basil beef by The Woks of Life (recipe).  I wanted to make sure I did this right, so instead of using whatever basil I could find at Walmart, I went to our neighborhood asian store and had them grab real Thai basil for me.  Y'all... the smell of this stuff is heaven.  Do not be afraid to go to your own local Asian store to get the correct ingredients!  It is so worth the trip.


This was made even easier, because Walmart had stir-fry ready thin cut beef so it was pretty much a toss in the pan and done recipe.  I missed the step of tossing the beef in cornstarch first, and wish I had because it would have helped keep the pieces separated better and would have helped out with the sauce at the end.  So don't forget that step!


We just ate this with some Jasmine rice and Aldi's frozen pork egg rolls (amazing!!!).  I really need to do an Aldi's post soon.  Kyle wished there had been a little more sauce to mix in with his rice, but enjoyed this dish, and Myles was a major fan!  I enjoyed it but agreed there should have been a little more sauce (easily remedied) and I might enjoy a squeeze of lime over it next time!  Overall, we have a winner folks.

For more information about Thai Basil, this post is very informative!


Friday, October 2, 2015

foodie friday : shepherd's pie


I have never had shepherd's pie.  I'm not sure why, especially since Kyle is such a meat and potatoes person.  I have had a million versions of it come across my screen lately though, so when I scored 3 pounds of ground beef on clearance for my freezer, I decided it was time to test one of them.


I chose this recipe from myrecipes.com since it seemed straightforward and all I needed was the beef broth.  The only change I made was that I made my own mashed potatoes (a little creamier than normal so that they didn't dry out during the baking step) and I baked at 375F for 30 minutes per other recipes I had seen.  I did this because I had put it together during nap time and put it in the fridge for a bit while we waited on Kyle, so I wanted to make sure it heated all the way through.  


Tips for making it... make sure to have all of your ingredients ready to go before you start throwing things into the hot pan.  I felt like I was scrambling and justcouldnotfindtheteaspoon when it should have been a simple dump and stir.  Also, if you have plenty of potatoes, make more than what you think you will need.  This should have been a really quick recipe to make but took a long time for me because I only used 3 potatoes at first and that barely covered all of the meat in the dish, so I had to boil some more.


Overall, it was good.  I will file it under the occasionally make again tab for those times I need something that will have leftovers when I have a pound of beef to use up.  Next time I will probably throw in some thyme like I saw in a similar recipe just to add a little different dimension to the flavors.  I think maybe I would have enjoyed some roasted or sautéed veggies as a side.  Myles thoroughly enjoyed it, and Kyle ate his whole plate without any complaints.  


Friday, September 25, 2015

foodie friday : pumpkin spiced


Like everyone, I love the time of year that pumpkin spiced coffees make their debut.  But I really hate spending the money on them.  For the past couple of years, I have kept my eye out for pumpkin syrups, but nothing ever tastes right.  I have tried making my own, but it always ends in disaster.  

Then one day it hit me.  Maybe I should be trying to make my own creamer.  Maybe then I can achieve pumpkin spiced success!  I have had numerous store bought pumpkin creamers and they are all just ok; and like the coffee shops, completely fake in the pumpkin department.  So I started searching Yummly, and after sorting through some weird recipes, I found one that sounded very promising.  Of course I tweaked it to my liking and pantry stock (which I will share below), but the bones of the recipe are from My Organized Chaos.

REAL Pumpkin Spiced Creamer
inspired by My Organized Chaos

1 C half-n-half
5 Tbsp pumpkin puree
3 tsp pumpkin pie spice (make it yourself)
1 can sweetened condensed milk
1 tsp real vanilla extract
1/2 C milk

Whisk it all together in a bowl, pour into a saucepan and slowly heat until steaming.  Remove from heat and occasionally whisk to prevent a skin from forming as it cools.  I chose to strained mine while I bottled it up to get out some of the larger chunks of spices, but you probably don't have to.  Refrigerate and shake before each use since the spices settle.


I use about 2 tablespoons or more (+sugar) in a mug of STRONG coffee for a close likeness to what I would buy out, except for every morning, late morning, and afternoon pick-me-up in my house.  Whipped topping is optional and totally recommended.  Leftover spices and puree can be mixed in to plain yogurt for a special treat, your pancake batter, or maybe I should try making mini hand pies?!

The best part is, you can buy pumpkin puree year round.  And all together, this recipe probably costs about the same as one grande fake pumpkin spiced latte at your favorite coffee shop.  


Friday, September 18, 2015

foodie friday : pork chop stroganoff


I ran across this recipe almost as soon as I downloaded Yummly to my Kindle.  Simple? Meat? Gravy? Mushrooms? Crock Pot?  Definitely.  This is a new favorite indeed.  And guess what?! 

Kyle likes it.  

Like for real.  No little shoulder shrug of semi-approval.  Full on, "yeah that is good!" approval.  Myles gobbled it up the first time I fixed it, this time however, he is sick with a mystery fever of some sort.  So he doesn't want to eat anything but cheese and cookies.  


Ignore the terrible quality of photos, I did have a toddler underfoot so you guys get the phone pics this time, no fancy camera use.  And everything in this recipe is brown...soooooo... not even a fancy camera will make it look pretty.  This is how easy it is:  mix the soup and gravy mix in the slow cooker.  Toss in sliced mushrooms (I use baby bella because that is what Aldis had for cheap but I don't think it matters), brown the chops in butter (just use boneless... it will save you the headache of searching for the bones when all that meat falls apart later), and deglaze the yummy brown  bits with a little water and toss that all on top of your shrooms.  Cook on low about 5 hours or so.  Mix in the sour cream with the rest of the gravy before you serve.  Real recipe is found at The Midnight Baker.


We enjoy these with some mashed potatoes; this time I roasted some delicata squash as our other side.  Haven't had delicata?  It is super yummy, like a mild butternut, but SO MUCH EASIER to deal with because you can eat the skin and it is much smaller.  Trader Joes finally has them back out for 99 cents each.  Love winter squash season!  Just cut in half, scoop out the seeds, slice 1/2 inch thick, and bake on a cookie sheet at 375F for about 30 minutes after you sprinkle on a little olive oil and salt, flipping them over half way through.  They are delicious cold the next day too!

Friday, September 4, 2015

foodie friday : rice&beans

please excuse the long hiatus, we have been enjoying summer with lots of visitors, a little travel, outside play, developing friendships, tons of books, and a couple of cleaning sprees.  I got out of my groove and I'm not apologizing for that; we had fun!

I specifically look for the combo meals at our Mexican restaurants that include both rice and beans.  But I rarely fix them at home.  The boxed rice is never that great, and the canned refried beans are just okay.  This week, I had the pleasure of taking a meal to our friends who just had their second babies, but I didn't just want to take them enchiladas.  So I searched through Yummly and Google and eventually found some super easy recipes to take along. In both instances, I made significant enough changes that I will just put my version of each on here.


Ok, so confession time.  The rice turned out a little dry.  And I would wager that it is because I let the liquid boil a little too long in the beginning, and then when it was time to pour it in, the cast iron dutch oven (I'm on a learning curve here, only second time to ever use it) was way too hot by that point and so it flash boiled to a scary degree and probably a lot of the liquid was gone from the get-go.  Also, if you didn't notice, this recipe is going to make a TON.  I needed to, since I was taking a good bit to friends, but next time I will probably half the recipe and either use only half the can of petite diced tomatoes (I did like the look of the chunks) or just a small can of tomato sauce.  You can see the original recipe here, I just changed it because I thought the extra steps were a little unnecessary.

The original recipe is for cuban style black beans over at skinnytaste.  I have never bought scallions, have never used red wine vinegar, and wasn't looking for cuban beans.  I just needed a kick-off point for how to doctor up some canned black beans.  It worked.  They were a little runny, so next time I will either add less water, or I will simmer uncovered for the entire time instead of holding in that steam.  Otherwise, Myles went to town on these things, and I kinda didn't want to share.  Not bad if you are like me and need an alternative recipe since you always forget to soak dried beans overnight for the authentic thing.

Friday, June 26, 2015

foodie friday : zucchini muffins


This recipe is tried and true.  I have never found another recipe I prefer anywhere near this one.  I have made these zucchini muffins with my grandmother and now on my own for many years and they absolutely do not get old.  It is no frills, none of that chocolate chip or nut business, just good warming cinnamon flavor.  I also almost always make them in muffin form.  They take less time to bake than a loaf, so to me, they hold moisture much better than a larger shape, and don't start tasting overdone on the en If I need them to be in a sliceable form, then I will bake them in a bundt pan instead.  So don't ask me how long it will take to bake a normal large loaf, because I have no idea.


zucchini muffins
homegrowninky style

2 1/2 C shredded zucchini
1 C oil
3 eggs
1 3/4 C sugar
1 tsp vanilla extract

Mix together above ingredients and then sift together the following dry ingredients in a separate bowl:

3 C all purpose flour
1 tsp baking soda
1/2 tsp baking powder
1 tsp cinnamon
1 tsp salt

Slowly combine the dry to the wet mix.  Pour batter evenly into greased muffin tins.  Bake at 350F for 15-18 min, until toothpick inserted in muffin comes out clean.  Let cool on a rack completely before storing. 

You could throw in about a 1/2 C of chopped pecans or walnuts if thats your thing... but it isn't mine.  I just don't mess with a good thing.  These have always been a big hit so I try to make them on occasion for the residents (I like to send something they can easily grab on the run to their next trauma or consult) and dear friends (like Lyndsey who appreciates muffins at 3am with her new 2nd born son!).  Or just for me to have a few for breakfast.

Or lunch.

Or mid-afternoon snack.

Or all of the above.  No judgement.


Friday, June 12, 2015

foodie friday : chicken thighs


Kyle's mom found this recipe when we went to visit last month.  Honey-garlic-soy marinade and the slow cooker make these super simple.  I really don't know why I don't use chicken thighs more.  They are cheap, they are moist and extremely flavorful compared to most whole chicken breast recipes.  The recipe for these was a bit salty for me so I cut the soy sauce in half, and bone-in thighs were what was on sale so I cut the skin off and tossed them in.  


I just served them on a bed of jasmine rice and since I didn't have any sides that I thought would go with them, I just grabbed some green onion from the garden, some leftover mushrooms, and frozen peas and quickly sautéed them.  My only wish was that there had been more of all that!


I also decided to wisk in some corn starch to thicken the sauce to more of a gravy consistency.  The result was pretty great!  Kyle and Myles both really enjoyed them.  We will be using this recipe again.


Friday, May 29, 2015

foodie friday : homemade ice cream


I didn't really want to do dessert recipes 2 weeks in a row... but it is officially summer in SC and everyone needs ice cream.  Stat!

My family has always been big on homemade ice cream every summer.  We always made the base for whatever flavor we wanted the same way... and I never knew that a lot of other people use eggs in their's.  So this no-egg for the kid momma is happy to keep things traditional around here.  


Growing up, ice cream was churned out on the deck.  When I decided I wanted my own ice cream maker a few years ago... I did the same thing.  Until I realized that the melting salted ice was spilling onto the 2 decks below our's at our apartment.  So I noisily made different flavor combinations in my kitchen sink.  Pumpkin cheesecake, key lime pie, peach ice cream... just to name a few.  And then we moved and I forgot about it.


Until last weekend.  A couple from our small group invited us to their house for burgers so I enthusiastically decided I would bring some ice cream.  The flavor was the only decision to make.  After much deliberation, I decided on chocolate banana.  

homemade chocolate banana ice cream. 
by: homegrowninky

1 can sweetened condensed milk
1 can evaporated milk
1 cup heavy whipping cream
1 cup sugar
1 box chocolate instant pudding
half gallon 1% chocolate milk
2 very ripe bananas...mashed well

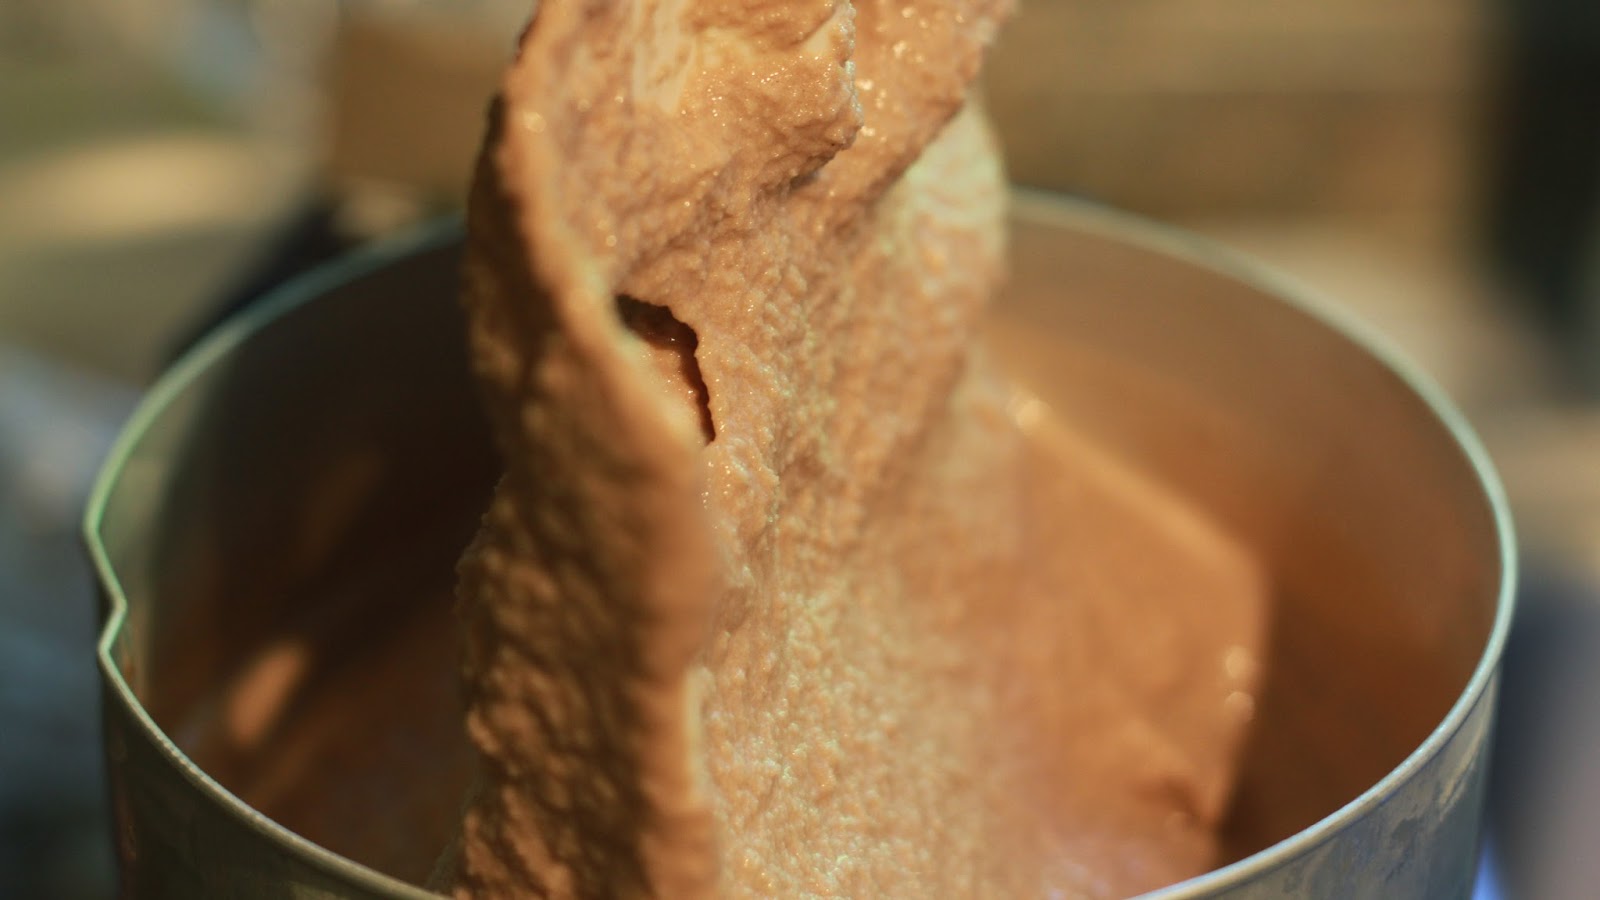
I combine all of the ingredients... filling the freezer container to the fill line with however much chocolate milk it takes (not quite the entire half gallon).  Make sure to have plenty of ice in your freezer.  I almost ran out!  And ice cream salt to help get everything as cold as possible!  As you can tell from the 2nd photo, it is really soft ice cream; which is great, but I froze it overnight to firm up for Sunday dessert!

You can do any flavor combination you want.  Change the pudding flavor, use half-n-half instead of cream and chocolate milk.  Throw in peaches or key lime juice or strawberries.  The possibilities are endless, and that is what I love about homemade!  No eggs required.


Friday, May 22, 2015

foodie friday : orange juice cake


My first part time job was working in my small town grocery store's deli for 2 summers.  It had its ups and downs... your typical minimum wage part time job.  I mostly sliced meat and cheese, but some of it was super fun.  Like baking and decorating cakes and assembling the delicious giant sandwiches we called Cow Patties.  


The one thing I really took out of that job was a love for this thing called an orange juice cake.  We would make them 6 at a time and they were always awesome.  When I left, I knocked the 6 cake recipe down to a normal 1 cake recipe, and then promptly lost it.  However, my grandmother makes it too and reminded me how to do it.  


I needed a quick and easy recipe for our small group this week, so I fixed this while the boys played in the back yard on Sunday.  It was still fantastic and ready to go on Monday.

Orange Juice Cake

cake:
1 box yellow cake mix
1 box instant vanilla pudding mix
1/2 C vegetable oil
3 eggs
1 C orange juice

glaze:
1 stick of butter
1 C sugar
1/4 C orange juice

Mix the cake ingredients really well and pour into a well greased bundt pan.  Bake as the box directions say for that type of pan.

Combine the glaze ingredients in a saucepan and bring to a boil while stirring, then set aside.

When your cake comes out, it would probably be best to turn it out of the pan for a second to make sure it is unstuck, then put it back in the pan.  That was something I wish I had done; instead I just poured the glaze right in and then it was really hard to turn it out without destroying it, I used a small rubber spatula to help me out.  Poke holes in the cake.  I used a chopstick but you can use a fork or something.  Pour the glaze all over it to soak in.    Let it soak for about 20 minutes while it begins to cool, then turn it out onto the plate or carrier you will be serving from.  Slice in and ENJOY!  Our small group sure did.  


Friday, May 15, 2015

foodie friday : beef 'n barley


My rockin' little brother sent me an enameled cast iron dutch oven for my birthday this year.  So when I saw this recipe on The Chew recently, I knew I wanted to try it for the first meal from that beautiful piece of cookware.  


Mario Batali talked this one up as his favorite comfort food that his mother always made him.  Even though it is hot as Hades down here lately, I wanted me some comfort food anyways.  And I'm glad I tried it out.  This has the makings of just an okay meal... but the addition of the jalapeño gives it a whole extra dimension that made this completely worth it.  


I did not make any changes to the original recipe at all, other than doing a slightly smaller batch.  I even did the poached eggs at the end (after setting aside plenty for Myles to eat).  I will tell you though, don't waste your time on the eggs.  There is such complex flavors and textures going on in this stew that you just don't notice them at all, and you definitely don't need the extra protein. I will leave the poached egg for my ramen where it makes a difference.  


I can't wait to try out some more recipes with my new dutch oven! You should definitely give this one a try, just pay attention to all of the directions before you get started so that you know how long each of the steps take... the barley goes in after 2 hours of simmering and needs an hour to cook.  Oh, and leftovers were fantastic (after adding a little water because the barley soaks up a lot of the stock).  We served this with hunks of french bread which was great to soak up the last bit of the stock.  We ALL enjoyed this one.  Do you have any recipes you recommend I try next in this thing?

Friday, May 8, 2015

foodie friday : stuffed zucchini

I just got my garden planted, which totally means I need to be gearing up for when I am overwhelmed with the massive quantity of produce I won't be able to eat alone in a couple of months.  Time to try a new recipe.  Because I'm the only one in the house that will eat zucchini muffins.


Actually, that isn't really why I made this.  I made this because my popping-5-teeth-including-4-molars-all-at-the-same-time toddler was back to his old ways of being super angry at me when I tried to get in the kitchen and be productive feeding him, so I totally only paid attention to the ingredient list for the beef and barley stew recipe I was gearing up to try.  I prepped for that with him angry at me, was totally ready for the next 20 minutes of sautéing everything with him on my hip, and then I looked at the directions and found out that it would be a 2 hour simmer time instead of the 30 minutes that I thought based on the episode of The Chew that I watched and I needed us to eat like now.  They should really include the "or you could do it this way" directions that they mention on the sly with their recipes.  Just saying.  So then I switched gears and got started on the quicker, less prep meal that I had planned for this week... these sausage stuffed zucchini.  Let me tell ya, Myles was super thrilled with that new development.


I looked at a million different recipes, and then got annoyed and just did whatever I felt like doing with all of that research in mind.  The result was awesome and you should probably remember to thank me later.  And make the whole batch, because I only did half just in case we weren't thrilled with it; after the first bite I was really mad because I could have eaten a lot more of it if it had been available.

italian sausage stuffed zucchini
by: me.

4 medium zucchini 
1 lb italian sausage
1/3 C plain breadcrumbs
1/3 C grated parmesan
1/2 medium onion diced
about 1/4 C your favorite pasta sauce
shredded mozzarella

Cut the zucchini length wise in half, scoop out the seeds.  Place in a microwave safe dish and cook for 2 minutes until crisp/tender.  Meanwhile, cook the sausage and onion.  Mix together the cooked sausage and onion with the breadcrumbs and parmesan.  Add enough sauce to help hold it all together.  Fill the zucchini with the meat mixture and top with the shredded mozzarella.  Bake at 350F for 30 min.  Serve topped with warmed sauce. 


We had this with some garlic bread; it might be fine with some pasta or just a great salad of some kind.  I was completely in love with this as something different than our norm.  Kyle had his typical reaction but did actually eat 2 of them with no complaints.  And Myles gobbled it up.  So this is going to be repeated for sure.  

Tuesday, March 31, 2015

my favorite cookies ever.


I don't remember where this recipe came from.  I'm pretty sure I just kept looking at a bunch of recipes until my head hurt, so I ended up combining good ideas from different ones together and the result was pretty darn good. So I have stuck to it.  I think I originally made them for Kyle during his first year of med-school because white chocolate is his favorite (no nuts!) so I wanted a great white chocolate chip cookie recipe.  

I make them all the time.  It is extremely rare that I don't always have the ingredients on hand.  Usually I send most of them to the hospital as a treat for the residents; this batch went to our small group as part of our pizza party.  


In the past month though, I have started switching things up.  Really, the base is fantastic and can support whatever flavors you want to add.  For 6 years, that has always been white chocolate.  Yesterday, I used half of the dough with w.c. for Kyle, and the other half I used semi-sweet chocolate chips and raisins.  You could add your favorite nut or other dried fruit, I am sure, with pretty great results.  

For simplicity's sake, I will just do the original white chocolate chip cookie recipe.  Feel free to free style the add-ins to your liking!


Homegrown Hillary's white chocolate chip cookies

1 stick butter - room temperature*
1/2 C Crisco

beat together until smooth, then add :

2 eggs - room temp*
3/4 C packed light brown sugar
1/2 C granulated sugar
1 tsp vanilla extract 

in a separate bowl, combine :

2 1/2 C AP flour
1/2 tsp salt
1 tsp baking soda

slowly add to the wet mix until well combined. then stir in your add-in :

1 C white chocolate chips (or whatever you want)

Oven is preheated at 350F.  I have always found that the cookies turn out more uniform and easier to take off the cookie sheet if you line it with parchment paper and scoop with a cookie scoop (like a small ice cream scoop).  The first batch usually takes exactly 10 min to bake to perfection (barely golden brown on the edges and almost looks raw in the center), and each batch afterward only 9 min since the pan is already hot.  Ovens vary though so keep an eye on them and always set your timer!

Let the centers collapse a little and then remove to a cooling rack before you store them in an air tight container.  

Makes ~ 4 dozen
*room temp is a necessity.  if the dough is cold (or you pack down your flour and add too much) then they don't spread out like they should and end up dome shaped... still tasty... just look weird.

Trust me on the barely-done appearance... this is how you get nice soft chewy cookies that stay that way for a few days when properly stored.  If you wait for the tops of the cookies to start to brown, then once they completely cool, they will be hard.  Maybe thats how you like them, but that ain't how we roll. 


Friday, March 27, 2015

foodie friday : stir-fry


I used to experiment with stir-fry a few years ago, but more recently it just hasn't been something I think about.  Then a recipe popped up on my phone news feed for Thai ginger chicken stir-fry from the kitchn (recipe).  I only really needed the sauces, so Myles and I hit up the Asian grocery about half a mile from the house. 

The recipe is pretty well written in the directions... but I still made a couple of dumb choices that made this good when I think it could have been great.  So I will share those, and the thing I think would be a good addition for later.  Because I will be making this again!


First, I really don't know the best way to slice chicken breast for stir fry but it always turns out kinda chewy... when at the chinese takeout we order from, it is always nice and tender.  After some research, apparently, part of the problem is that I always slice with-the-grain, the best way is against the grain for smaller muscle fibers.  The other main issue was that I used the leftover frozen pepper strips I had on hand instead of a fresh red pepper.  The flavor was there in the finished meal, but I really was missing that nice crisp bite of a lightly cooked pepper.  A smaller issue was that I used the brown rice I already had, but really would have enjoyed this better with a long grain jasmine rice instead.


Next time though, I think I will toss my chicken with cornstarch before I cook it so that in the end we will have a thicker sauce than we did.  That was Kyle's only complaint...that there wasn't enough sauce to cover the rice.  I think it was just that it was so runny it didn't stick to it enough to really be enjoyed.  Over all though, this was a really tasty dish!

Anyone have any tips or tricks for stir-fry they want to share?  I may need to go out and buy a new wok since I got rid of the one I never liked when we moved...